by TrigoKlei
Have you ever wanted the cute little cockroach eating a Krabby Patty from Spongebob Squarepants? Well, now you can!
I modeled this to be as accurate as possible while still printable without needing too many supports.
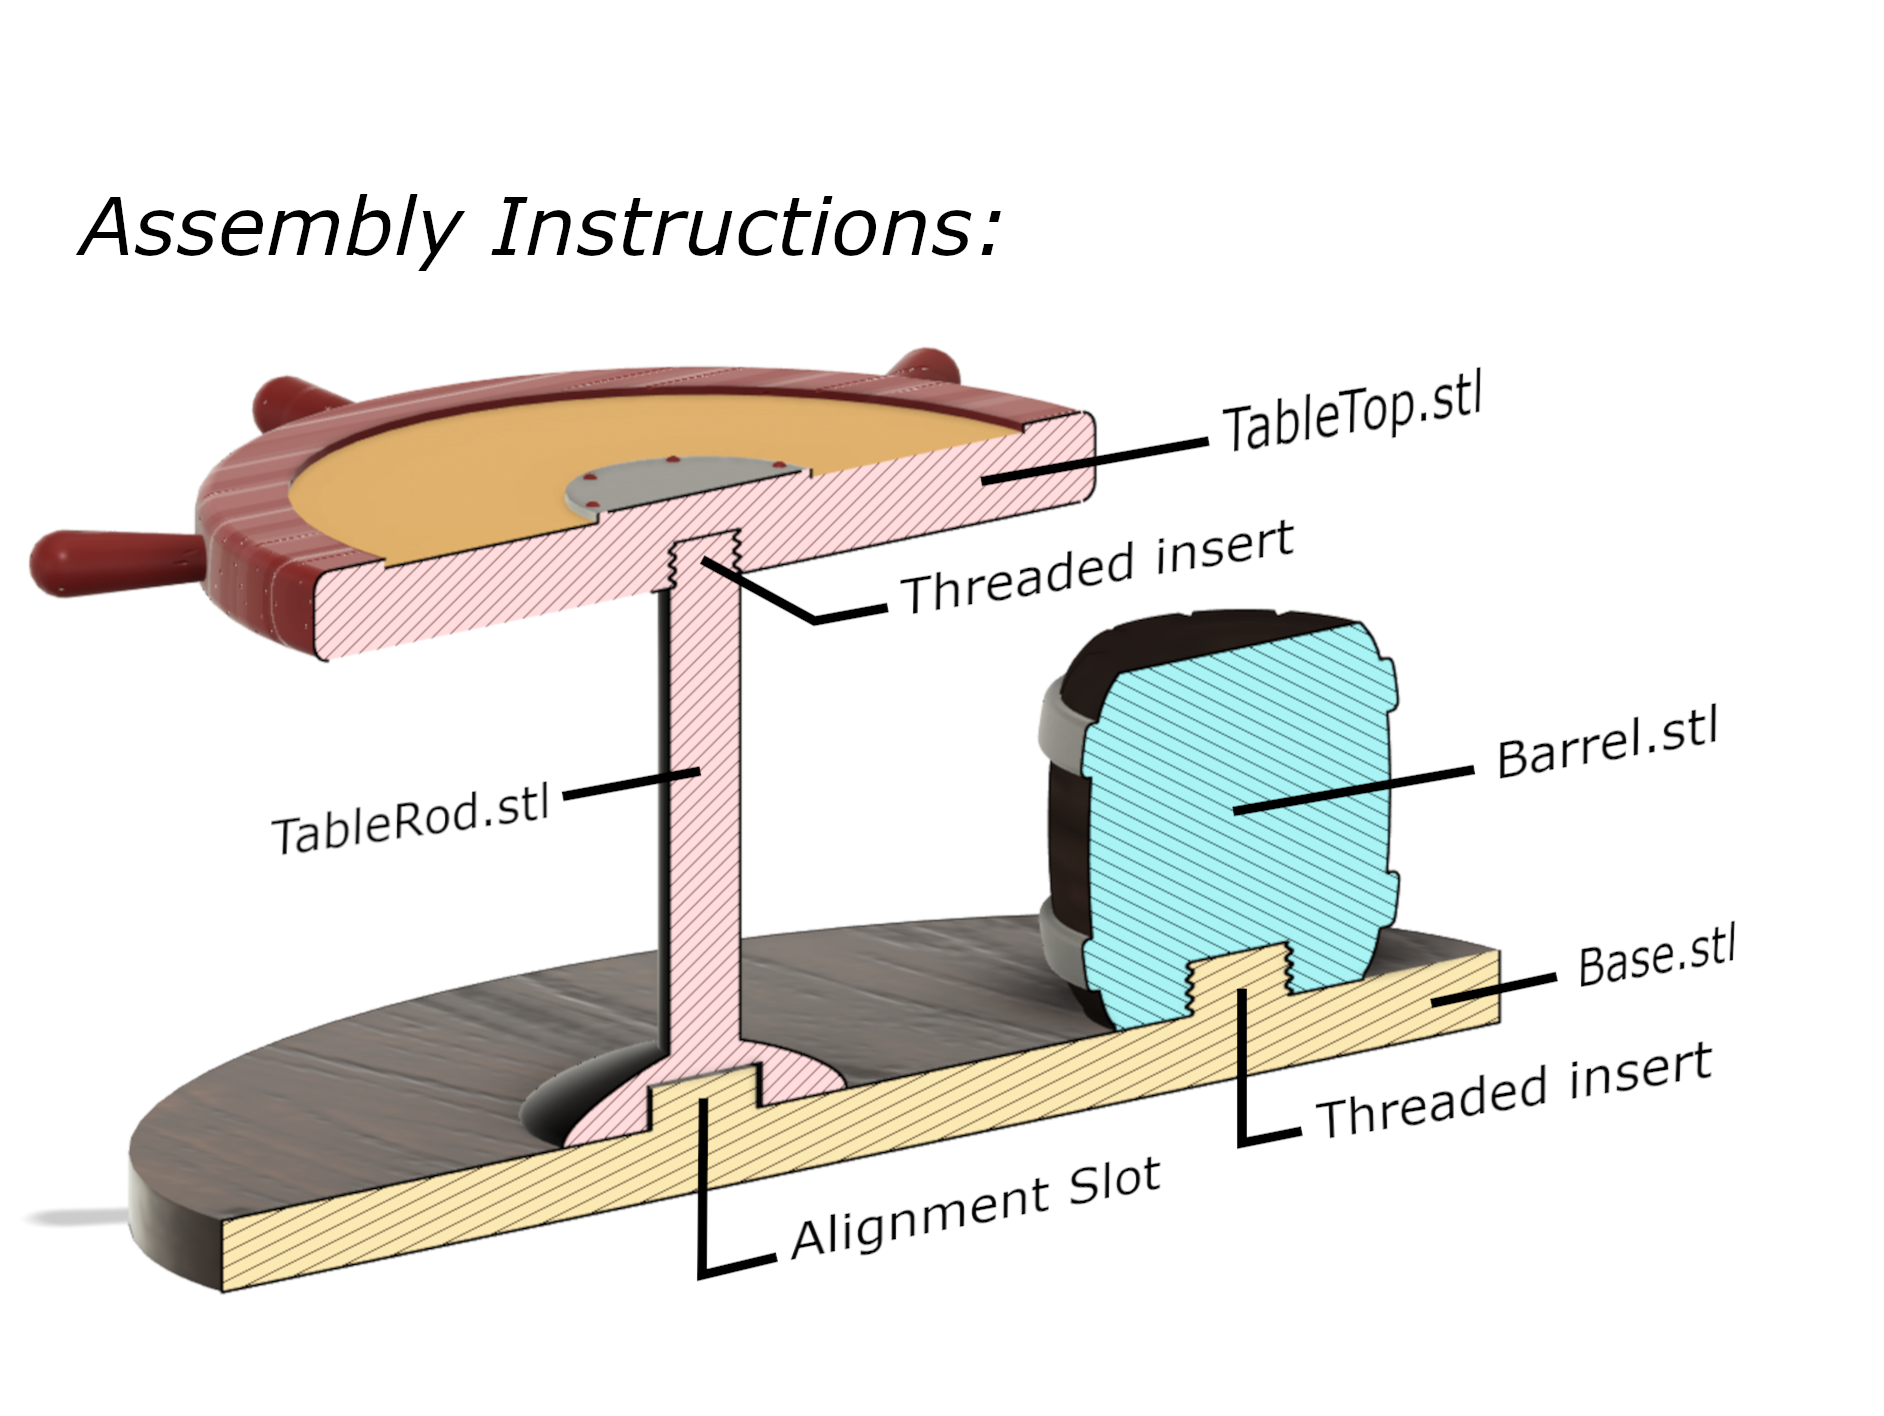
The Barrel and TableTop can be screwed on, all other parts should be glued on. There are alignment slots for parts connecting to the Base, so assembly should be very easy.
If you print it, I'd be more than happy to hear your feedback (all criticisms/suggestions are welcome) and please share your makes/remixes for others to see!
Thank you and Happy printing!
Print Settings
Printer brand:
Creality
Printer:
Ender 5
Rafts:
Yes
Supports:
Yes
Resolution:
0.12 - 0.28mm
Infill:
15 - 20%
Filament_brand:
Generic Brand
Filament_color:
Any
Filament_material:
PLA/ABS
Notes:
I highly recommend using ABS as vapour smoothing will give you a polished, professional finish with relative ease. You will need a raft and supports to print the Cockroach.stl Supports will be needed for the little handles ONLY for TableTop.stl *IMPORTANT: YOU"LL NEED SUPPORT BLOCKERS FOR THE THREADED INSERTS* Everything else can be printed without supports or rafts.
How I Designed This
Using Fusion 360 (Free Software & Tutorials)
Starting with a reference image of the cockroach meme, I use the modeling tools within Fusion 360 to create each printable part of the final model. It is simply a matter of systematically building the individual components. I started with the base, then moved on to the table, barrel, cockroach, and finally the burger. I am self-taught in Fusion 360 (I highly recommend this YouTube channel: https://www.youtube.com/user/TheKHaug/featured ), using an education license so everything is completely free. That is why I make this free for you, and I hope that you'll take up an interest and share your own creations for others to print! It only takes an afternoon to begin a lifelong learnt skill.
Assembly

Assembling the Table and Barrel to the Base:
I recommend painting each part individually prior to assembly. Be sure to varnish if using acrylic or other non-varnished paints. 1. Screw in the Barrel to the threaded insert on the Base. 2. Screw TableTop.stl to TableRod.stl. For more security/stability you may want to add some adhesive. 3. Position TableRod.stl (with the tabletop) onto the alignment slot on Base.stl. I designed it with a clearance of 0.5mm to prevent binding, but you may need to glue it to secure it firmly to the Base. IMPORTANT: Make sure the handles on the table is positioned away from the Cockroach before gluing! 4. Glue the Cockroach to the Barrel once you're happy with its position. 5. Glue the Burger onto its hands. Make sure to use a strong adhesive as the contact area is small and at an angle.